Home > Motorcycle Community > Tips for Motorcycle Riders > Pros, Cons, and How to Use an Action Camera
Pros, Cons, and How to Use an Action Camera
Have you ever wondered how to capture the thrill of wind-whipped rides and breathtaking twists and turns on your motorcycle? Dive into the exhilarating world of action cameras mounted on helmets, where every twist of the throttle and scenic route comes alive. Discover the art of securing that perfect shot while navigating the open road. Let’s explore the ins and outs of motorcycle action camera setups, from securing mounts on uneven helmet surfaces to framing the perfect ride.
Helmet-Mounted Action Cameras for Motorcycle Riding
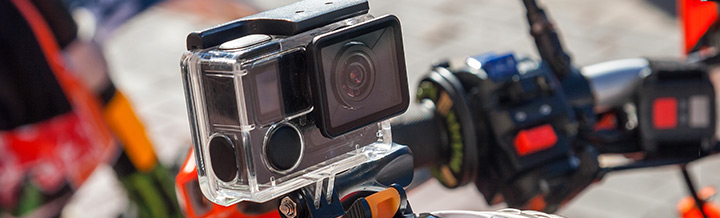
When considering action cameras, several options cater to diverse preferences and needs. The GoPro stands out as a popular choice, renowned for its compact design, high-quality footage, and versatile mounting options. Sony Action Cam offers competitive features, boasting excellent image stabilization and advanced shooting modes, ideal for capturing smooth and immersive footage during rides. Insta360 presents a unique perspective with its 360-degree capability, enabling riders to record panoramic views and immersive footage, providing a different dimension to the riding experience. Each camera offers distinct features and functionalities, catering to riders seeking various levels of image quality, stabilization, and innovative shooting perspectives for their motorcycle adventures.
Pros of Using a Helmet Action Camera
significantly enhance the riding experience while fostering safety, skill improvement, and community engagement among riders.
- Enhanced Safety and Documentation
Helmet-mounted action cameras offer a valuable safety tool by documenting rides and potential incidents. They provide evidence in case of accidents or disputes, aiding in insurance claims or legal proceedings. The footage captures the surroundings, road conditions, and behaviors of other drivers. - Skill Improvement and Learning
These cameras serve as a learning tool for improving your riding skills. Reviewing recorded footage allows riders to assess and analyze their maneuvers, identifying areas for improvement. It is an effective method for self-assessment and skill enhancement. - Memories and Content Creation
The ability to capture and share favorite rides or adventures is a significant advantage. Action cameras create a personal archive of memories, allowing riders to relive experiences and share them on social media or vlogs. This fosters a sense of community among riders and enthusiasts. - Increased Awareness and Community
The presence of cameras often leads to increased awareness among riders and other road users. Riders become more conscious of their actions, promoting safer riding practices. Sharing footage with fellow riders fosters a community that discusses techniques, road conditions, and safety measures, contributing to overall safety and knowledge sharing. - Remote Monitoring and Navigation
Advanced camera models with GPS capabilities can serve as navigation aids, assisting in documenting routes and exploring unfamiliar terrains. Some cameras offer live streaming or remote viewing options, allowing loved ones or emergency contacts to monitor rides in real time, adding an extra layer of safety and connectivity.
Cons of Using a Helmet Action Camera
As riders explore the advantages of helmet-mounted action cameras, it’s essential to consider potential drawbacks. While these devices offer various benefits, understanding and balancing the accompanying cons is crucial for a well-informed decision.
- Riding Discomfort and Safety Concerns
The aerodynamic impact of helmet-mounted cameras introduces potential discomfort and safety considerations for riders. As these devices protrude from the helmet’s surface, they can catch the wind, creating drag and turbulence. This might lead to discomfort or neck strain. Additionally, in the unfortunate event of an accident, the camera could potentially catch on objects, increasing the likelihood of neck injuries or exacerbating the force of the impact.Beyond physical implications, the psychological awareness of being filmed presents a nuanced concern. Some riders, conscious of the recording, might succumb to the temptation of showcasing daring maneuvers or pushing their limits to capture exhilarating footage. This heightened focus on creating compelling content can lead to unsafe riding behaviors, prioritizing cinematic moments over personal safety.
- Video Quality and Technical Challenges
Helmet-mounted action camera’s fixed position on the rider’s head can lead to shaky or jumpy footage, particularly when the head moves swiftly or frequently, potentially causing crucial moments to be lost or poorly recorded. - Financial Considerations and Security Risks
These devices often come with a substantial price tag, and adding necessary accessories like mounts or protective casings can significantly escalate the overall expenditure. Furthermore, forgetting that the camera is attached to your helmet poses an additional concern: the risk of theft. Leaving the helmet unattended, even momentarily, presents an opportunity for thieves to target the visible and valuable camera attachment.Moreover, legal implications might impact your ability to install a camera on your helmet. Certain jurisdictions might prohibit or restrict the use of modifications to safety gear like helmets. This presents the possibility of the camera’s installation being deemed unlawful. Understanding and complying with these legal frameworks is crucial to avoid accidental violations and associated penalties.
- Data Management and Storage Concerns
Action camera footage consumes significant memory space, you need adequate storage solutions for managing the vast amount of recorded footage. It can also take a significant amount of time to review, edit, and produce complete footage worth sharing.
How to mount an Action Cam on a Helmet
To mount a helmet action camera effectively, take several test runs while seated on your bike on a level surface. Then, review the footage. This process not only aids in fine-tuning the mount’s position using adjustment knobs but also helps you acclimate to the camera’s feel on your helmet, ensuring a comfortable and well-positioned setup for your rides.
Mounting Location
Selecting the ideal mounting location for your motorcycle action camera on the helmet is crucial in capturing dynamic footage and perspectives during rides.
- Top of Helmet
Top-mounted cameras allow for an elevated view of the surroundings. The advantages of top-mounted cameras include an unobstructed view, ideal for capturing wide-angle shots and scenic views of the road ahead. This position also minimizes interference with body movements, providing a stable perspective during activities. They are typically attached with an adhesive mount. However, potential downsides include increased wind resistance, which might affect aerodynamics and cause wind noise in the footage. The higher positioning can sometimes create a disconnected feel from the action, and the camera might be more susceptible to impacts or snagging on obstacles. - Chin Mount
Typically secured with straps or adhesive pads, these mounts provide stability and capture immersive footage. Compatibility with your camera model and helmet type is crucial for optimal functionality and security. Positioning the chin mount requires careful consideration to avoid obstructing vision or interfering with safety features.Despite their advantages, chin mounts come with drawbacks. Some users report discomfort, especially during extended use, while wind noise may affect audio quality. The footage can also look a bit chaotic if you move your head around quickly or a lot. Compatibility issues with certain helmet types also warrant attention before purchase.
- Side Mount
Mounting an action camera on the side of your helmet captures footage from a lateral angle. These mounts, typically attached using adhesive pads or specialized mounts, enable the camera to capture scenes from the wearer’s profile. When affixing the camera, ensuring a secure and level placement without hindering head movement or causing discomfort is crucial.Footage from side-mounted cameras often provides an engaging perspective, highlighting the wearer’s interactions, surroundings, and actions. However, potential downsides include the possibility of the camera protruding and potentially snagging on objects or being more exposed to impacts in case of a fall. If you do not hold your head level, you can end up with slanted, off-kilter footage. Despite the potential drawbacks of exposure and protrusion, the lateral viewpoint offers a unique angle, adding depth and dynamism to the captured footage.
Action Camera Mounting Methods
The irregular and curved surface, combined with the inability to drill into the helmet, means you have to get creative when mounting your camera. Always follow the manufacturer’s instructions. It’s also smart to use a safety tether as an added safeguard against potential mount failures to prevent the camera from detaching during use.
- Adhesive
Action cameras often come with adhesive pads tailored explicitly for helmet attachment. Cleaning the helmet beforehand is crucial to ensure a strong and lasting bond. A mild detergent and water will work, followed by thorough drying before mounting.
Choosing the camera’s position involves considering the desired field of view while ensuring it doesn’t obstruct vision. Peel the adhesive mount’s backing and firmly press it onto the selected spot. Once affixed, allow the adhesive to set as per the manufacturer’s instructions to establish a sturdy bond between the mount and the helmet. - Suction Cup
The reliability of suction cups for action camera mounting can be a concern due to the constant road vibrations that may cause the suction to loosen and disengage. Considering the unpredictability of these mounts on uneven surfaces or at higher speeds, relying solely on suction cups might not provide the stability needed to capture the desired footage. - Helmet Clamp or Clip
Some motorcycle action cameras come with helmet clips designed to attach to the helmet’s vents or openings, providing a convenient temporary mounting solution without requiring adhesives or straps. These clips offer swift and effortless attachment, but their security might not match that of adhesive or strap mounts. Checking and reinforcing the camera’s positioning will ensure a reliable and stable setup for capturing your adventures without any mishaps. - Straps
Another option is to use a strap mount to attach your action camera to your helmet. Straps are nice because they give you a lot of flexibility in camera compatibility and positioning. When selecting a strap mount, check the compatibility with both your helmet type and action camera model. Positioning the mount on the helmet is crucial in determining the perspective captured. Common spots include the helmet’s top, side, or front. Secure the straps tightly around the helmet, adjusting for a snug fit before attaching the camera using a suitable bracket. Strap mounts are a dependable method, offering versatility for capturing thrilling adventures in incredible point-of-view footage.
Safely Use Your Action Camera
Always stop the bike before operating the camera controls. Managing the camera while riding poses a significant safety risk. This caution becomes even more critical if you wear gloves, as it hampers your ability to feel and locate the controls accurately.
Use a Motorcycle Action Camera Responsibly
Using a motorcycle action camera on your motorcycle helmet transforms riding experiences by capturing thrilling moments and ensuring safety documentation. Whether opting for chin, side, or top mounts, understanding proper attachment methods and considering the best positioning for unique perspectives greatly enhances footage quality. However, while cameras offer an extra layer of security in documenting rides, having comprehensive motorcycle insurance remains crucial for overall protection on the road. In unforeseen events, insurance provides financial and legal safeguards. Speak with an agent today to ensure you have the right motorcycle insurance coverage tailored to your needs.