


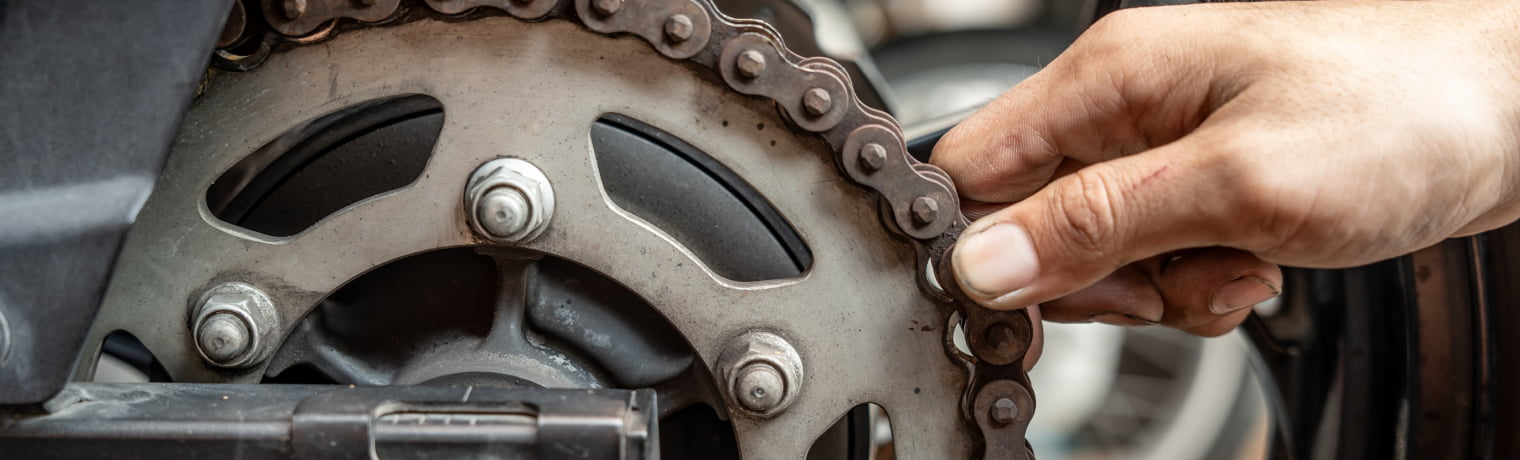
How to Do a Belt to Chain Conversion on a Motorcycle
Final drive belts on most motorcycles are designed to propel the bike, but keep down the noise. They need to be changed every now and then due to dry rot and wear. These can be pretty costly to repair. Ever have a belt break on the road? Sometimes they are impossible to remove without disassembling the primary or final drive sprocket. This is something very hard to accomplish without different specialized tools. There are different reasons people prefer belts over chains and visa versa. Regardless, a belt to chain conversion on a motorcycle is still very easy. Taking an Evolution equipped Harley-Davidson Sportster as an example: the chain conversion can easily be reversed if it did not suit the person.
Doing a chain conversion on a Sportster requires limited mechanical knowledge and a little patience. Please note that a chain can be very dangerous if installed incorrectly, DO NOT attempt this if you are not certain it is done correctly.
Tools Needed:
- Basic socket wrenches (metric or SAE)
- Open end/ratchet wrenches
- Allen keys/ Torx drivers/ Screw drivers
- Straight edge
To get started with the belt to chain conversion, secure the front wheel either down or against something (wheel chock preferred). The rear wheel will need to be raised into the air so that it can be removed. The belt has two pulleys. One is attached to the main shaft of the transmission and the other to the rear wheel hub. The rear wheel axle can be loosened and the belt adjusters loosened as well. This will make slack in the belt.
This site and articles contained herein are provided for general informational purposes only and are not a substitute or intended as professional advice. Please be sure to refer to your owner’s manual or consult a mechanic for information specific to your motorcycle. The information contained on this site and articles contained herein are provided on an “as is” basis with no guarantees of completeness, accuracy, usefulness or timeliness and without any warranties of any kind whatsoever, express or implied. Rider Insurance Company and its affiliates (together, “Rider”) assume no responsibility for any errors or omissions in the content of this site and articles contained herein. Any action taken upon this information is strictly at your own risk and Rider will not be liable for any losses or damages in connection with your use of this site and articles. Additional terms and conditions apply and are available at https://www.rider.com/plymouth-rock-assurance-general-terms-and-conditions/.
The main shaft pulley has a cover that is usually held on by two bolts. To gain access to the main shaft pulley this cover is removed. Depending on the motorcycle’s exhaust, it may have to be removed in order to gain access to the main shaft pulley. The belt guard will need to be removed as well. Pull the belt off of the rear wheel sprocket and let it hang. Remove the axle, and remove the rear wheel. Make sure to keep in mind how many spacers if any were on the axle. The belt can be either cut or a shock may be temporarily disconnected to remove it.
To attach the conversion, both pulleys need to be replaced with chain sprockets. The belt pulley on the rear wheel is held in place with perimeter bolts on the wheel’s hub flange. Remove the bolts and pulley. A new chain sprocket can be bolted in place now. The same bolts or new hardware can be used; don’t forget to put thread locker on the bolts. Torque the bolts as per the manufacturer’s service manual. The size and tooth count of the rear chain sprocket depends on rider preference. The size of the sprocket effects either low end off-the-line power or highway cruising. Mount the rear wheel with its spacers and axle. Just snug it up, to make sure everything is in alignment.
The main shaft pulley is a little more detailed. It is held by a large nut and locking plate. It is easiest to remove with an impact wrench. Once the main shaft nut is off, two small bolts hold a locking plate to the main shaft pulley. Once they are removed the pulley will come off the main shaft. Behind the pulley is a spacer that will need to be replaced. Inside the spacer is a quad-seal. It looks like an O-ring. That will also be replaced. The main shaft seal should also be replaced, so that it does not leak in the future; it is worn to the old spacer. The seal comes off by drilling a screw ever so slightly into it. Once it has some grip the seal can be pulled from its place. A new seal is installed by lightly tapping it with a hammer.
The spacer in the chain conversion is larger than the belt spacer. This is due to the chain have much less thickness than the belt. The main shaft seal and splines are lubricated, and the new quad-seal and spacer are installed by sliding them down the shaft. The spacer has a taper which is placed towards the transmission. A new sprocket is installed with a lock plate and bolts. The large main shaft nut is then torqued back in to place. Remember again to use a thread locker on all bolts and nuts.
Using a straight edge make sure, the main shaft sprocket and wheel sprocket are in perfect alignment. Spacers can be used to make the alignment perfect. Make sure the wheel is at its forward most position in the axle plates. The belt tension adjusters should be completely unadjusted. An O-ring chain can be used for durability. The pitch of the chain determines how light or heavy it will be. This again depends on how the bike is driven. Lay it down along the sprockets to determine where it needs to be cut. Find the link where the chain would fit the best and subtract one link. Use a chain breaker to cut it. Then use a master-link to put it together around both sprockets. The chain should be slightly loose, that is when the adjusters come in. Adjust the rear axle to tighten it. It should have a deflection recommended in the service manual, but a good rule of thumb is about ½ of an inch. Tighten the axle nuts to their recommended torque. Re-install the belt guard and transmission pulley covers.
Just like that, it is all done. Chain conversion kits can be costly. All the parts can be basically sourced individually, but the kits are a great way to save that person the hassle. An issue on the rode can be fixed with simply a new chain and master-link. The only maintenance is chain lube every now and then. Safe riding!
Plymouth Rock Assurance is a marketing name used by a group of separate companies that write and manage property and casualty insurance in multiple states. Motorcycle insurance in New Jersey and Pennsylvania is underwritten by Rider Insurance Company. Each company is financially responsible only for its own insurance products. Actual coverage is subject to the language of the policies as issued by each separate company.